Spicing Things up w/ i3 and Polybar
One of the big perks of Linux is that you can customize just about anything to your heart’s content. The open source nature of Linux allows for this. As such there is some great open source software out there that I use myself to build out a minimalistic desktop environment for my machines at home. i3 and Polybar.
Why i3?
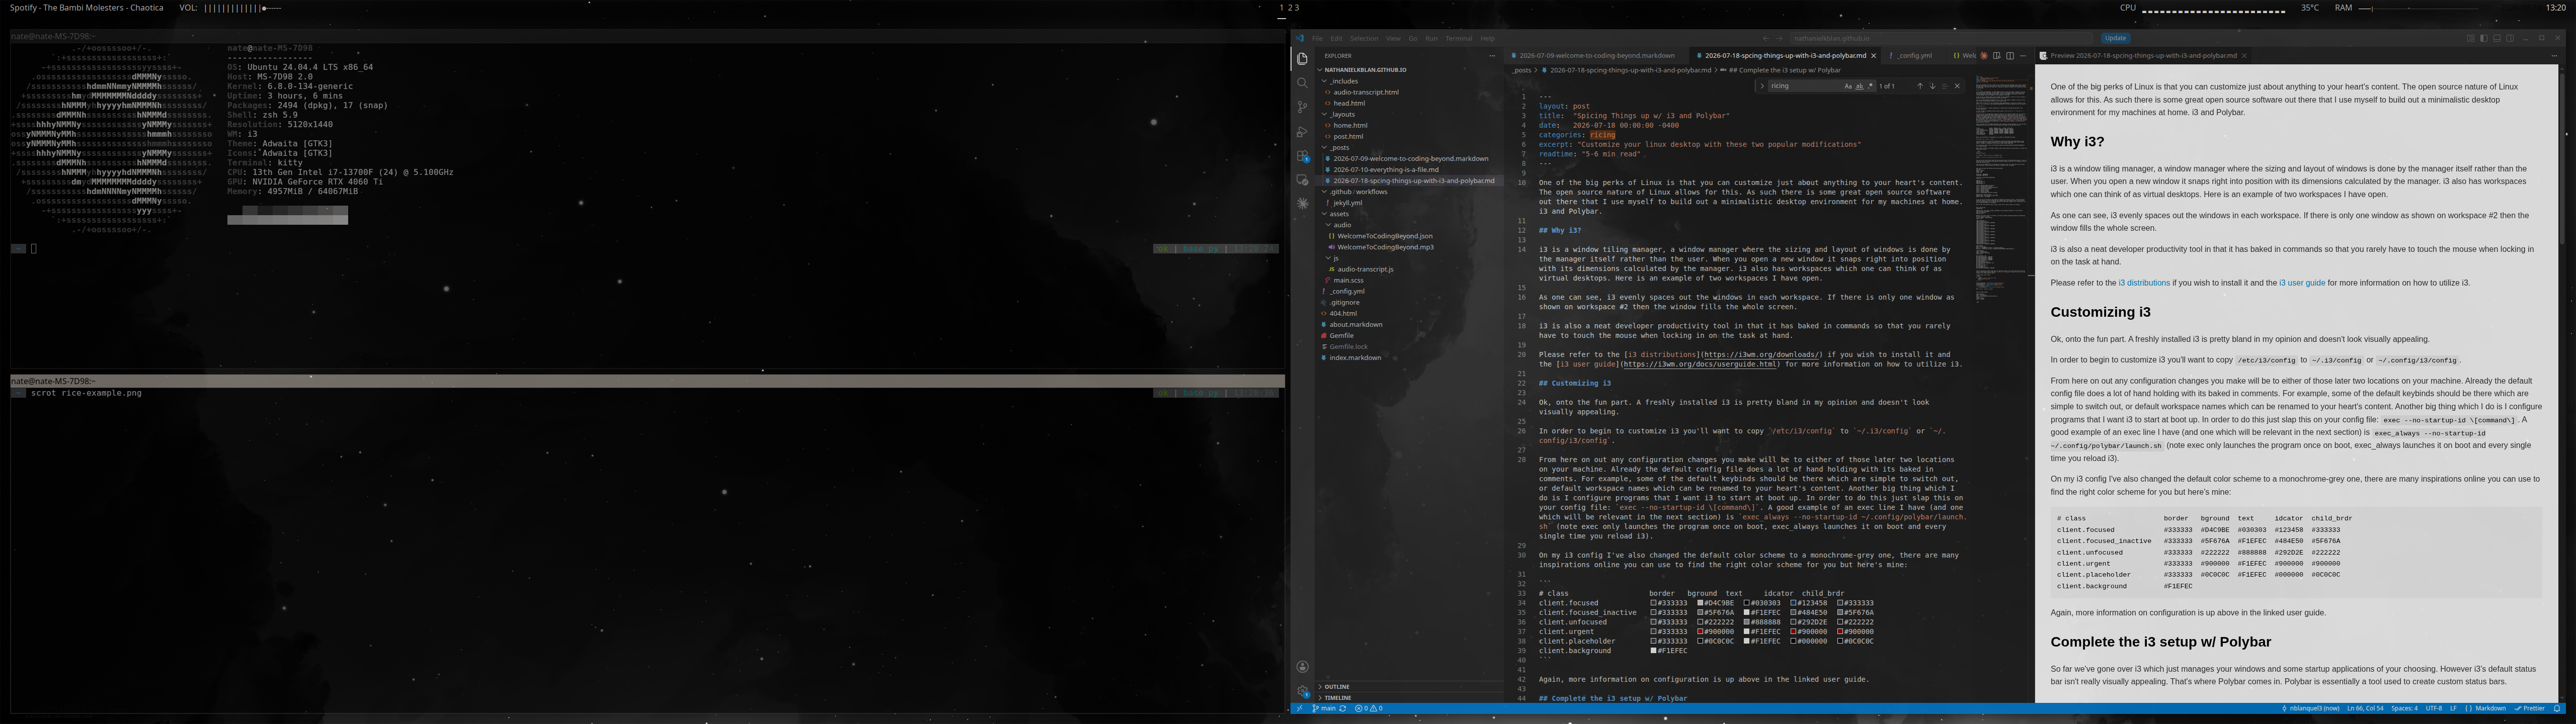
i3 is a window tiling manager, a window manager where the sizing and layout of windows is done by the manager itself rather than the user. When you open a new window it snaps right into position with its dimensions calculated by the manager. i3 also has workspaces which one can think of as virtual desktops. Here is an example of two workspaces I have open.
Workspace 1
Workspace 2
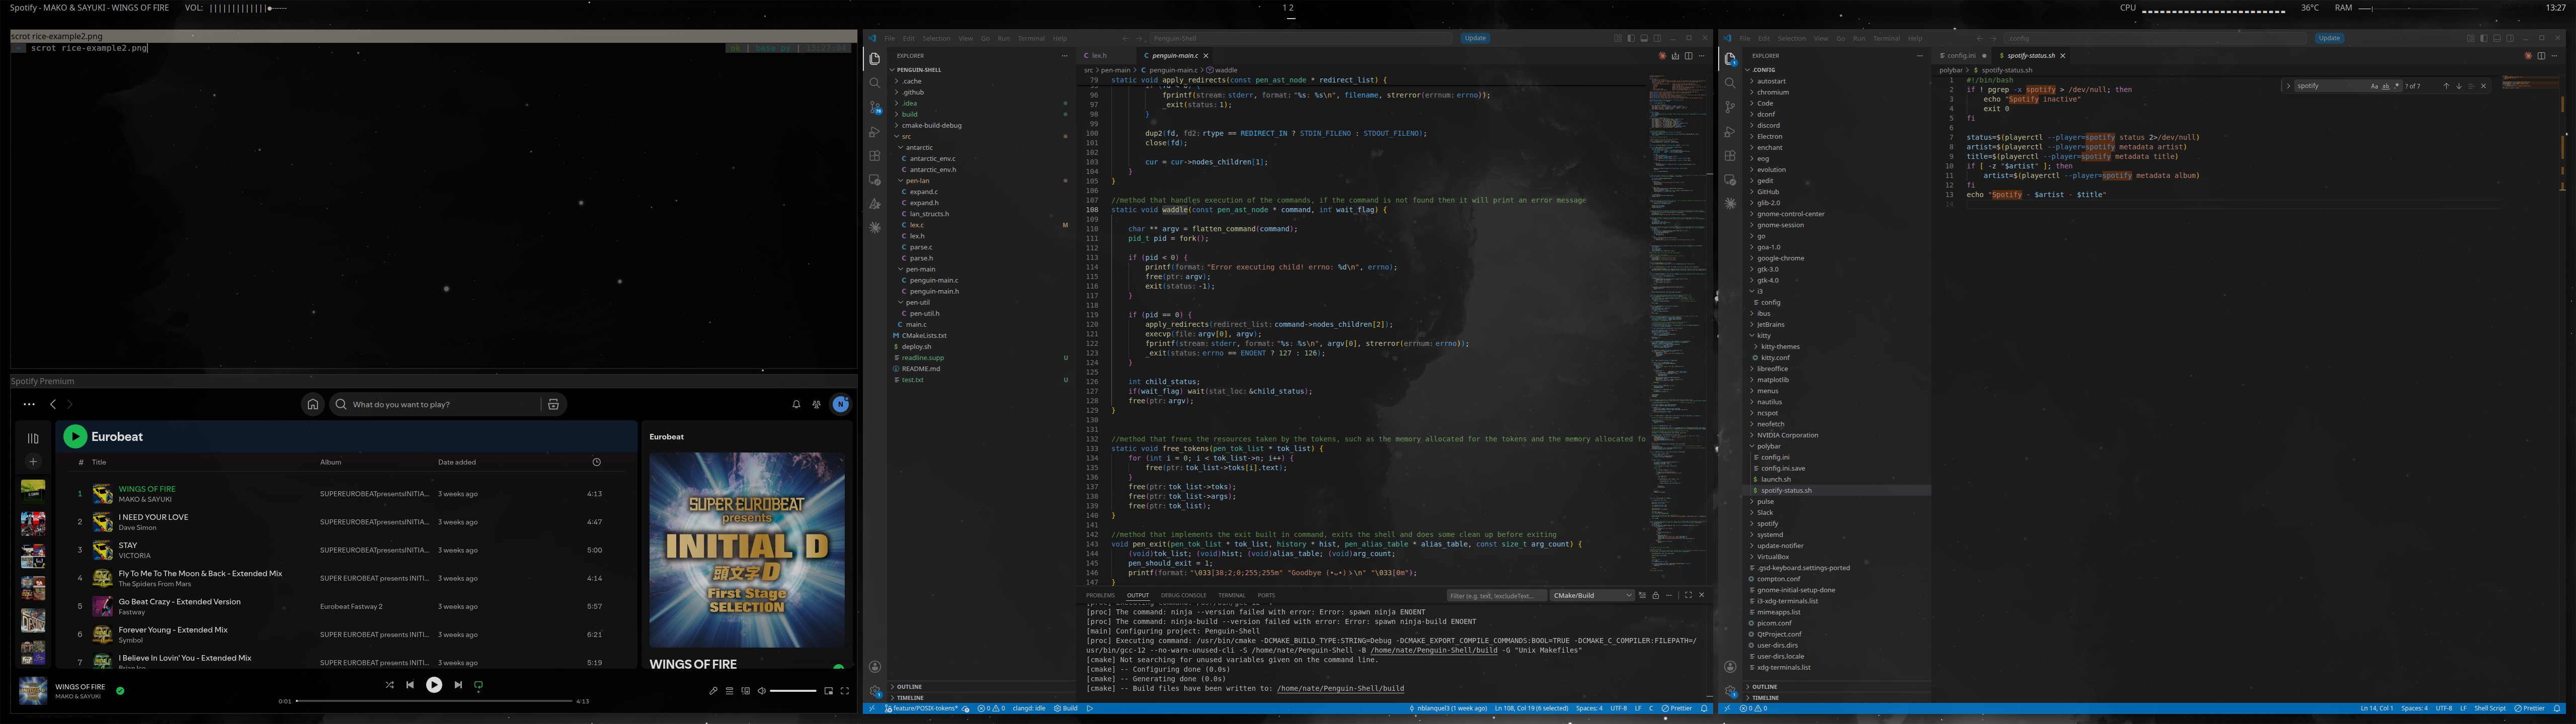
As one can see, i3 evenly spaces out the windows in each workspace. If there is only one window as shown on workspace #2 then the window fills the whole screen.
i3 is also a neat developer productivity tool in that it has baked in commands so that you rarely have to touch the mouse when locking in on the task at hand.
Please refer to the i3 distributions if you wish to install it and the i3 user guide for more information on how to utilize i3.
Customizing i3
Ok, onto the fun part. A freshly installed i3 is pretty bland in my opinion and doesn’t look visually appealing.
In order to begin to customize i3 you’ll want to copy /etc/i3/config to ~/.i3/config or ~/.config/i3/config.
From here on out any configuration changes you make will be to either of those later two locations on your machine. Already the default config file does a lot of hand holding with its baked in comments. For example, some of the default keybinds should be there which are simple to switch out, or default workspace names which can be renamed to your heart’s content. Another big thing which I do is I configure programs that I want i3 to start at boot up. In order to do this just slap this on your config file: exec --no-startup-id \[command\]. A good example of an exec line I have (and one which will be relevant in the next section) is exec_always --no-startup-id ~/.config/polybar/launch.sh (note exec only launches the program once on boot, exec_always launches it on boot and every single time you reload i3).
On my i3 config I’ve also changed the default color scheme to a monochrome-grey one, there are many inspirations online you can use to find the right color scheme for you but here’s mine:
# class                   border   bground  text     idcator  child_brdr
client.focused            #333333  #D4C9BE  #030303  #123458  #333333
client.focused_inactive   #333333  #5F676A  #F1EFEC  #484E50  #5F676A
client.unfocused          #333333  #222222  #888888  #292D2E  #222222
client.urgent             #333333  #900000  #F1EFEC  #900000  #900000
client.placeholder        #333333  #0C0C0C  #F1EFEC  #000000  #0C0C0C
client.background         #F1EFEC
Again, more information on configuration is up above in the linked user guide.
Complete the i3 setup w/ Polybar
So far we’ve gone over i3 which just manages your windows and some startup applications of your choosing. However i3’s default status bar isn’t really visually appealing. That’s where Polybar comes in. Polybar is essentially a tool used to create custom status bars.
For installation refer to the readme over on their github.
Next create a directory for polybar configs in your config directory of choice and in it create this simple shell script.
#!/bin/bash
killall -q polybar

while pgrep -x polybar >/dev/null; do sleep 1; done

polybar --config=~/.config/polybar/config.ini top &
This will be the launch script that the i3 exec_always config I mentioned above points to. This will essentially kill any already running polybar process and boot up a new one. So it doubles as both a launch and refresh script.
Then as one can probably note I’ve pointed to a config.ini file. It is here that you will define your status bars. Here the syntax for the bars is simple, here’s an example:
#you can also define the bottom bar with [bar/bottom]
[bar/top]
monitor = None-1
width = 100%
height = 38

background = #00000000
foreground = #ccffffff

line-color = ${bar/bottom.background}
line-size = 2

spacing = 2
padding-right = 5
padding-left = 5
module-margin = 4

font-0 = NotoSans-Regular:size=12;-1
font-1 = MaterialIcons:size=10;0
font-2 = Termsynu:size=8:antialias=false;-2
font-3 = FontAwesome:size=10;0
font-4 = Unifont:size=8;0
font-5 = Unifont:size=8;0
font-6 = Unifont:size=8;0
font-7 = JetBrainsMono Nerd Font:size=10;1

modules-left = spotify volume
modules-right = cpu temperature memory date
modules-center = xworkspaces
As one can see we can define a vast amount of properties relating to your bar. The most peculiar properties however are those of modules-left, modules-right, and modules-center. Here you define your own custom modules in the order and position you want them to appear on your status bar. I’ll use my right hand modules as an example.
Here we have three modules I built to get a visual cue of resource usage on my machine:
#user defined name
[module/cpu]
#defined type, view https://polybar.readthedocs.io/en/stable/user/modules/ for the different available internal modules
type = internal/cpu
interval = 0.5
#defines the format (look) of the module, view https://github.com/polybar/polybar/wiki/Formatting for more details on formats
format = <label> <ramp-coreload>
label = CPU
ramp-coreload-0 = ▁
ramp-coreload-0-font = 5
ramp-coreload-0-foreground = #F1EFEC
ramp-coreload-1 = ▂
ramp-coreload-1-font = 5
ramp-coreload-1-foreground = #F1EFEC
ramp-coreload-2 = ▃
ramp-coreload-2-font = 5
ramp-coreload-2-foreground = #F1EFEC
ramp-coreload-3 = ▄
ramp-coreload-3-font = 5
ramp-coreload-3-foreground = #F1EFEC
ramp-coreload-4 = ▅
ramp-coreload-4-font = 5
ramp-coreload-4-foreground = #F1EFEC
ramp-coreload-5 = ▆
ramp-coreload-5-font = 5
ramp-coreload-5-foreground = #F1EFEC
ramp-coreload-6 = ▇
ramp-coreload-6-font = 5
ramp-coreload-6-foreground = #F1EFEC
ramp-coreload-7 = █
ramp-coreload-7-font = 5
ramp-coreload-7-foreground = #F1EFEC
[module/date]
type = internal/date
date = %%{F#99}%Y-%m-%d%%{F-} %%{F#fff}%H:%M%%{F-}
date-alt = %%{F#fff}%A, %d %B %Y %%{F#fff}%H:%M%%{F#666}:%%{F#fff}%S%%{F-}
[module/memory]
type = internal/memory
format = <label> <bar-used>
label = RAM
bar-used-width = 30
bar-used-foreground-0 = #F1EFEC
bar-used-foreground-1 = #F1EFEC
bar-used-foreground-2 = #FFBBAA
bar-used-foreground-3 = #FF5555
bar-used-indicator = |
bar-used-indicator-font = 6
bar-used-indicator-foreground = #ff
bar-used-fill = ─
bar-used-fill-font = 6
bar-used-empty = ─
bar-used-empty-font = 6
bar-used-empty-foreground = #444444
These three modules provide a good basis for getting started. If you wish to get more crafty and utilize custom types look into the type custom/script. Actually as a bonus I’ll throw in my own configs for my custom spotify module:
spotify-status shell script:
#!/bin/bash
if ! pgrep -x spotify > /dev/null; then
    echo "Spotify inactive"
    exit 0
fi

status=$(playerctl --player=spotify status 2>/dev/null)
artist=$(playerctl --player=spotify metadata artist)
title=$(playerctl --player=spotify metadata title)
if [ -z "$artist" ]; then
    artist=$(playerctl --player=spotify metadata album)
fi
echo "Spotify - $artist - $title"
spotify polybar module:
[module/spotify]
type = custom/script
exec = ~/.config/polybar/spotify-status.sh
interval = 2
format = <label>
label = %output%
-Nate